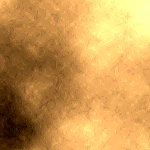
It can be used nicely for a web page background or even print type work.
Make a new RGB image 150 pixels High by 150 wide. Fill your background
layer with white. Make a new layer.
Press "D" and then "X" to reset to default colors. Ok now here’s an important part.
Try and get your Foreground brown color as close to mine. As you can see,
its already in the default swatches.
Apply the clouds. Filter>Render>Clouds. Then choose "Hard light"
from the layers pop down menu.
Ok lets bring in the detail. Filter>Sharpen>Unsharp Mask, Amount 500,
Radius 1.3, Threshold 0.
On the texture layer go to Image>Adjust>Brightness/Contrast. Turn down the
brightness a little and then turn up the contrast and play with it until you
get the look you need.